ASN Management
Overview
ASN stands for Advanced Shipping Notice. It is an electronic document or notification sent by a sender to a receiver that provides detailed information about a pending delivery.
ASNs streamline the receiving process, allowing retailers to prepare for incoming shipments, verify their contents upon arrival, and manage inventory more efficiently.
ASN Enquiry
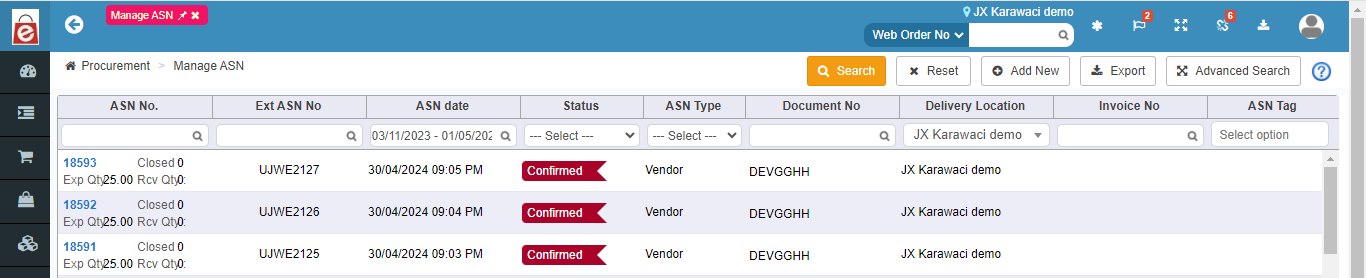
The ASN Enquiry screen allows users to view existing ASNs and edit/update the same. It provides the warehouse/store team visibility to all inbounds expected at the warehouse/store.
Navigation: Procurement –> Manage ASN

Fields | Description |
ASN No. | This is a system-generated unique code which gets generated when a new ASN is created. |
Ext ASN. No | This is a unique code given by the user while creating the ASNs. |
ASN Date | Users can see ASNs for a date range by filling in this field. |
Status | Users may narrow the search using the status of ASNs. An ASN can be available in one of the below statuses: Pending Confirmation – If an ASN is created and saved, then it goes into ‘Pending confirmation’ status. Confirmed – If an ASN is created and clicked ‘Confirm’, then the ASN got created and status changes to ‘Confirmed’. Part Received – If ASN is not fulfilled completely i.e. some items were received not all, then ASN status will be ‘Part received’. Closed – If all the items in an ASN is received completely, then ASN status becomes ‘Closed’.
|
ASN type | Users can search by filtering ASN type. |
Document No | Delivery Location: Users may filter records using delivery location. |
ASN tag | Tags are configurable LOVs that help group and identify ASN that need any special attention. |
Action Button | Description |
Search | Clicking on the search button without entering any filter criterion will populate the list of all the ASNs based on the default filter setting. Users can further narrow down the search by using filter options to get specific information. |
Reset | Reset button will refresh the filter fields to default settings, i.e. to an initial state to start a fresh search. |
Add new | To add a new ASN click on the add new button. |
Export | Upon clicking this button, pending reports will open where you will be able to download search results in .csv format. |
Advance search | user can search the data through the addition filter given in the advance search SKU & reference no. |
ASN Creation
ASN creation lets users create a new ASN.
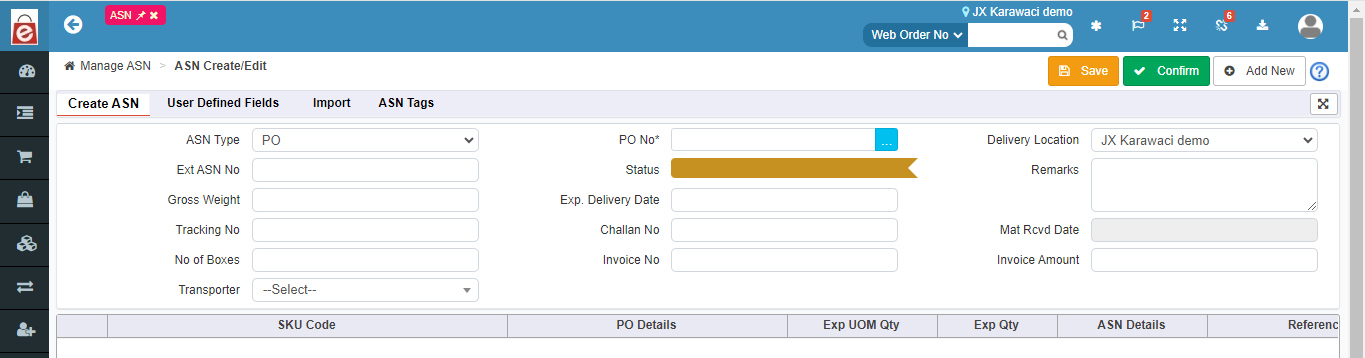
Navigation: Procurement > Manage ASN > ASN create/edit
Below are the 3 tabs in ASN Create/ Edit:
1. Create ASN
2. User Defined Fields
3. Import
4. ASN tag
1. Create ASN
Fields | Description |
ASN Type | ASN types can be PO, vendor, customer, Marketplace and other type. This needs to be selected at the time of ASN creation in the system. |
Vendor Code/ customer code/PO code/Channel Name | Users need to select the vendor code or customer code at the time of ASN creation if the ASN type is vendor or customer respectively. |
Delivery location | Users must mention the location for which the ASN is created. |
ASN No. | This is a system generated no. |
Ext ASN NO | This is an input field, users can fill the ASN no which is received from any external system. |
Status | This field shows the status of ASN throughout the processing cycle. |
Remark | In this field user remarks about ASN can be put. |
Gross Weight | This specifies the gross weight of the consignment related to ASN. |
Delivery date, Challan No., Mat. Rcvd date, Invoice no, Invoice Amount | These fields can be input at the time of ASN creation. |
Transporter | User can select the transporter from the dropdown. |
Action Button | Description |
Add SKU | This button enables user to add SKUs which will be delivered from the sender to receiver mentioned in the ASN. User needs to mention how many units he/she is going to receive in the UOM Qty field and press Add SKU. |
Save | Saves all details entered for the ASN |
Confirm | Upon clicking this button, it changes the status of ASN to confirm. |
2. User Defined Fields
User Defined Fields (UDFs) capture additional details of the ASN which are not captured in other fields in the application. There are a total five such fields users can use: UDF1, UDF2, UDF3, UDF4 and UDF5.

3. Import tab
If the user wants to import ASNs in bulk in the system using csv file, he may use import functionality.
Users will be able to import up to 2000 records at a time using this functionality.

When a user clicks on the import system will open the above page at the same time it will route the user to common import. Users can create the ASN through this as well.
Action Button | Description |
Download template | When the user clicks this action button, he will be able to download a template of import file. Fields marked in yellow color are mandatory fields which the user needs to enter for import of a record to be successful. |
Upload template (Choose file) | After data is entered in the template file, user needs to upload data in eRetail using this button. When the user clicks the button, a window will pop up prompting the user to upload a file from his computer. User needs to press OK after selecting the file in the system. |
Import | After a file is selected in the system, the user needs to press the Import button to upload data present in the file. During this process logs can be captured in the section below the import button. If a user uploads wrong data, then the system shows an error message. |
Reset | Reset button will refresh the filter fields to default settings, i.e. to an initial state to start a fresh search. |
Export | Users can see the uploaded file error messages, if any, at line level through this export. |

4.ASN tags
Users can add the tags against the ASN from this screen.In the tags user keep the extra information related to the ASN and can filter the tags on the basis of it.