Flipkart smart V2

About Flipkart
Flipkart is an Indian e-commerce company, headquartered in Bangalore, Karnataka, India, and registered in Singapore. The company initially focused on online book sales before expanding into other product categories such as consumer electronics, fashion, home essentials, groceries, and lifestyle products.
Business Model
Flipkart has an Inventory based model and a Marketplace model. In inventory based they create their own Inventory of products and dispatch the order from their own warehouses while the Marketplace model has the main role of sellers. They pass on the order to the seller and take commission or selling fee in return and the order is to be picked from the sellers’ center and then delivered to the customer.
Smart Seller Program is launched by Flipkart to improve the order fulfillment services of the registered sellers. The invite-only Flipkart Fulfilment program allows the benefits to the silver and gold sellers only. However, getting the silver and golden badge isn't that easy. The real struggle is to improve the seller’s sales and order fulfillment services, especially when you are the bronze seller.
In contrast to the Flipkart Fulfilment program, the smart seller program is designed to improve the seller’s warehouse's performance. The sellers registered under the Smart seller program need not put their stock at Flipkart's Fulfilment Center. Rather the Flipkart personnel will help you improve order management and handling.
Below is the List of Integrations available with Vin-eRetail for Flipkart:
- Flipkart v3.0 (Multi Warehouse)
- Flipkart Assured
- Flipkart Smart
- Flipkart Quick
- Flipkart 2Gud
- Flipkart Omni
Integration Highlights
In this integration with Flipkart, Vin E-retail supports Product listing pull, Order Fulfilment, and Return Management.
For this Model we have:
- SKU Pull
- Order Pull/Fetch
- Order Pack
- Order Shipment
- Manifest Download
- Order Return
- Inventory Update
Prerequisites
Mandatory Credentials
Please use the Flipkart Smart V2 channel only to configure Flipkart Smart. Below mentioned Credentials are mandatory and required to configure Flipkart Smart V2:
- Flipkart Seller User email / Password: This required credential will be shared by the seller/Brand once it is registered on Flipkart Marketplace. (Always use the Primary seller account i.e., Login credentials which have the admin access)
- Seller Id: Unique Id generated for each seller by Flipkart and can be fetched as mentioned below:
- Login to the Flipkart seller panel.
- Right-click and select the inspect button and then go to the network button as mentioned in the screenshot below:

- Copy the seller id as mentioned in the screenshot and use the same to configure the channel.
- Pull Completed Returns: This should also be set to YES.
- API Key / API Password: Following steps are involved to generate API Key and API
Password through Flipkart Seller Portal login
Visit the given link - https://api.flipkart.net/oauth-register/login

This will navigate to the API generation page of Flipkart.
Now login to the panel with the given username and password by the seller.
Click on the “Register new application” for Application ID and Secret Key generation as shown below.

And fill in the below details.Enter the Application name and Application description as “API” and register this application. As soon as you will register this application your Application Id (API Key) and Secret Key (API Password) will be visible to you.

Location ID: Location Id can also be retrieved from Flipkart Seller Portal as mentioned below:
Go to Orders > Smart Fulfillment Orders as mentioned in the screenshot below:

Chose the warehouse location from the dropdown as mentioned in the screenshot below:
Once this location is selected, Location Id is available in URL, Copy the same and use it to configure the channel. (Verify this location Id twice, make sure that location id should not be manually typed/edited).

Channel Mappings
Flipkart Seller SKU code to be mapped in Channel SKU Code and Flipkart Listing Id id to be mapped in Channel Product Id.
Other important configurations to be taken care of:
- For Flipkart Smart fulfillment, it is mandatory for the client to create a separate and dedicated location in Vin-eRetail.
Reason: Flipkart smart is integrated with Flipkart smart WMS and here the Bins which are created on Flipkart must be created in Vin-eRetail. - Download the Bin codes from Flipkart, available under Smart Fulfillment > Inventory Management.

then go to Reports > Available Bins as mentioned in the screenshot below and download the bin export:
- Use the same bin codes to create Bins in Vin-eRetail under the Saleable Zone.
- As per Flipkart smart, the Seller cannot store an SKU in multiple Bin. However multiple SKUs can be stored in a single Bin/Shelf/Rack.
- Test the inventory Update using 1 SKU only and check whether the inventory is successfully updating or not. (If there is any error coming, check the credentials first, if the credentials are correct then raise it to the Product integrations team).
- Flipkart Smart does not support Virtual Bundle SKU codes. Sellers must create physical bundles only.
- No virtual inventory, back-order quantity, etc. logic works in this case because here the Bin wise inventory will be pushed to Flipkart Smart.
- When Seller is processing the order from Vin-eRetail, He can create picklist the picklist of any no. of orders in Vin-eRetail. However, on Flipkart we always generate 1 picklist per order as mentioned in the screenshot below:

(Clients/Sellers have to do nothing that whether we are generating 1 picklist per order of multiple orders per picklist on Flipkart, Seller only has to process the order using Vin-eRetail).
Please note: This is a new integration so chances that client will face any issue. Discuss this with the Product Team or Product integrations L3 Support for any help/support.
Channel Configuration
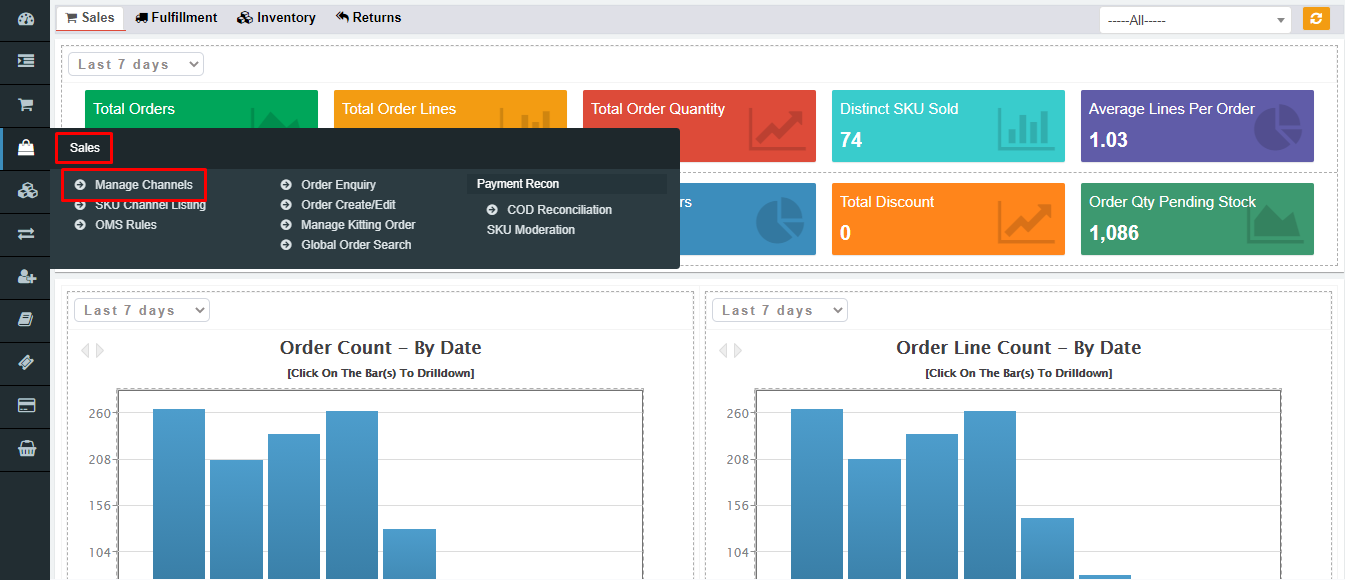
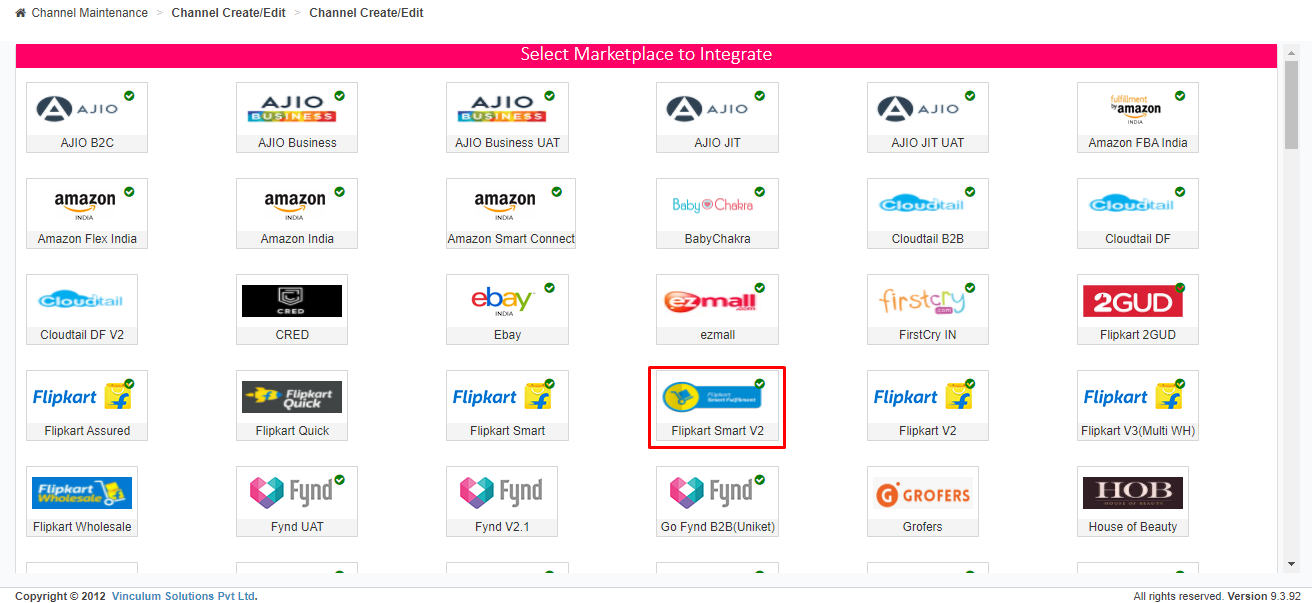
- Once all the above IDs are gathered, open your vin e-retail instance (ERP), go to Sales > Manage Channels.
- Go to the top right-hand side of the window and click on “Add New.”

- Select the required channel from the list.
- Fill in all the details like Channel Name, order Source WH, Order Sync from date, Return Sync from Date, SKU Pull from Date, Inventory Sync Method, Enable Inventory Reconciliation, etc.

- Click on Configure interface link. Fill in all the credentials generated from the Flipkart API and Flipkart Seller portal.
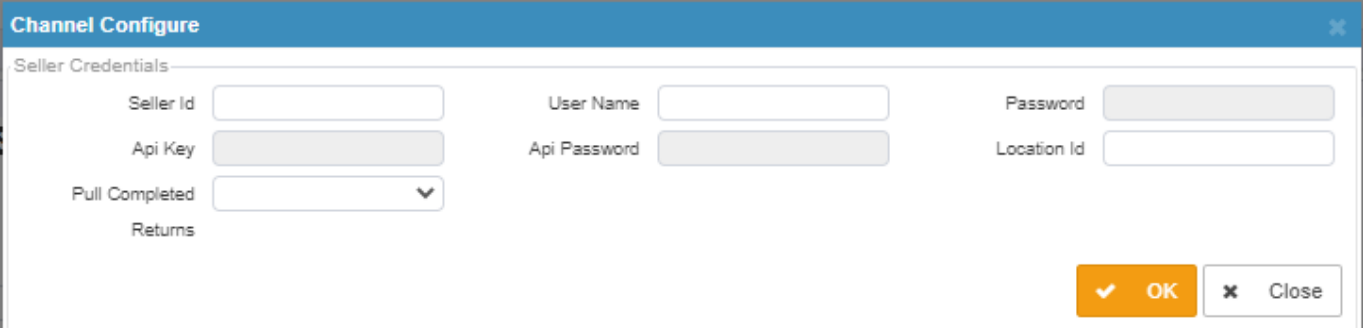
Enter the Seller ID, Username (Flipkart ID), Password, API Key, API Password, Location ID, and Pull complete returns (Yes/No).
Click “OK” and hit the “Save” button. The channel is successfully created and will be visible in the manage channel screen.

Enter the Seller ID, Username (Flipkart ID), Password, API Key, API Password, Location ID, and Pull complete returns (Yes/No).
Click “OK” and hit the “Save” button. The channel is successfully created and will be visible in the manage channel screen.
CHANNEL MAINTENANCE
Channel Maintenance setup helps the seller reduce manual intervention and avoid the multiple usages of the marketplace seller portal. With the selection of below options at Channel Maintenance window (Sales > Manage Channels > Add New > Select Flipkart Smart V2) in Vin E-retails instance, User can get the advantage of using multiple features of Vin E-retail:
S.No | Features | Where to Click on Channel Maintenance | Dropbox/Checkbox | Details |
1 | SKU Pull | Channel SKU > SKU SYNC > Pull/Push |
| SKU Sync: SKU Sync between Channel and e-Retail can be done via PULL & PUSH.
Users can choose to Pull the SKUs from the channel to the e-Retail panel.
And User can choose Push to send the SKU data or changes from e-Retail to the channel. |
2 | Order Pull/Order Pack/Invoice/Order Shipment/Shipping label generation | Orders > Order Sync > Yes/No |
| Order Pull: The user can choose to sync the order from the channel to e-Retail by managing this option. If this is disabled, the Order pull will not happen also the shipping label/Invoice and manifest will not get generated. |
3 | Order Return | Orders > Return Order Sync |
| Users can click this option to sync Return Orders.
Important Note: In Return Pull Services, the “Return” is always created in Confirmed status. Users need to do an inbound from Return Inbound functionality available on the Application. |
4 | Prefetch Shipment Label | Orders > PrePack Enabled |
| PrePack Enabled: The user can enable prepack for the order from here. To avoid delay in Order processing and Shipment fulfilled within a provided SLA, we have a feature to pull Flipkart shipment Label and Invoice at the same time of picklist generation instead of during Pack Call. To use this functionality, we just need to enable the Prepack checkbox available under the Channel Configuration setup screen and the user needs to click on Prefetch deliveries during the pending picklist status available on the Picklist enquiry screen. |
5 | Ready to Ship Status at | Orders > Ready to ship at |
| Users can choose to mark the status of ready to ship at any of the two events: -at Manifest or -at Pack |
6 | Use Market Place Shipping Label | Orders > Use Marketplace Shipping label |
| Users can select this option to notify the Shipping label by the marketplace and then opt from the Shipment label dropbox. |
7 | Inventory update | Inventory > Inventory Sync |
| If selected "Yes" from the dropdown box, it automatically pulls and updates the inventory. |
8 | Inventory Reconciliation | Inventory > Enable Inventory Recon |
| By clicking Inventory Recon as “Yes,” it enables Vin E-retail to reconcile the inventory. (* It is only scheduled for once/day)
Despite Inventory Sync, at times, there is a possibility of Inventory mismatch which can lead to a penalty by Flipkart as the seller continues to receive the order for which the physical inventory is not available. By clicking Inventory Recon as “Yes,” it enables Vin E-retail to reconcile the inventory.
(* It is only scheduled for once/day) |


